We've launched our new site at www.openlighting.org. This wiki will remain and be updated with more technical information.
OLA on Windows with VMWare
From wiki.openlighting.org
This explains how to run OLA on a Windows system using VMWare. This uses virtualization so it's not recommended for real time lighting control. However it's useful if you want to experimenting with OLA and perform tasks that aren't time sensitive like Running RDM Responder Tests
Contents
Prerequisites
- A Windows PC with a working internet connection.
- At least 20G of free hard disk space. Chance are you won't need that much.
Setting up the Linux System
This tutorial is based on these excellent instructions. The instructions are for Windows 7, but works fine on XP as well.
Download & Install VMWare Player
Download the free VMWare Player. You'll need to complete the survey and provide an email address. Install this on your windows machine. Reboot.
Download & Install Linux Distribution
I recommend Ubuntu. It's fairly easy to use and stays up to date. Get the latest version from here. Once this is done you should have an .iso file which will be around 600MB.
Setup a New Virtual Machine
Open VMWare Player, select "Create New Virtual Machine". Choose "Installer Disk Image" and point to the Linux .iso file you downloaded.
On the next screen setup a username & password. You can then control where the VM image is stored and the size of the image. The defaults are fine.
Click Finish to setup the Linux image. Installation of Ubuntu then begins.
You'll be asked if you want to install VMWare tool for Linux. Say yes as we'll use them later. The download will continue along with the install. This stage can take quite a while.
Once complete, you'll be presented with a graphical login screen showing the username that you setup before. Login to the system and you'll be shown the desktop.
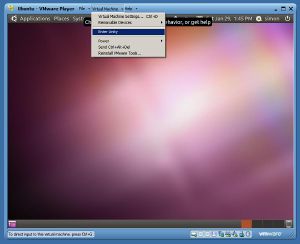
Next enter Unity mode. This seamlessly merges the Linux windows with the Windows desktop. You can also copy and paste between Windows and Linux at this point.
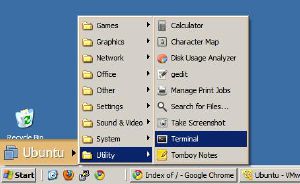
Finally open the Linux terminal application as shown below. You'll need to move your mouse to the Start button for the Unity menu to appear.
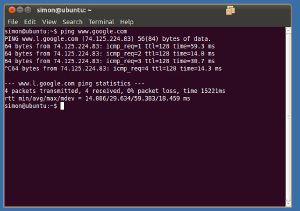
Now we'll confirm that the network is working. Type:
ping www.google.com
You should see responses like what's below. Hit Control-C to exit the ping program.
At this point we have a working Linux system. Time to install OLA
Installing OLA
These instructions closely follow OLA on Linux.
Install the dependencies
sudo apt-get install libcppunit-dev libcppunit-1.12-1 uuid-dev pkg-config libncurses5-dev git libtool autoconf automake g++ libmicrohttpd-dev libmicrohttpd5 protobuf-c-compiler libprotobuf-lite6 python-protobuf libprotobuf-dev
Then run ldconfig:
sudo ldconfig
Checkout OLA
Run the following to clone the OLA code:
  git clone http://git.opendmx.net/ola
  cd ola
Configure, build and test OLA
Type these
  autoreconf -i
  ./configure --enable-python-libs
  make
  make check
  sudo make install
If you want to do RDM responder testing you must add --enable-python-libs
Using OLA
At this stage, you can start OLA by running
olad -l 3
The -l flag controls the logging level from 0 (log nothing) to 4 (debug logs). 3 is log level info, which is usually enough for most people.
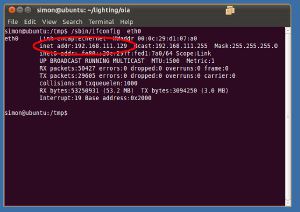
Now find the IP address of your Linux instance:
/sbin/ifconfig eth0
Look for a line that starts with inet addr:.
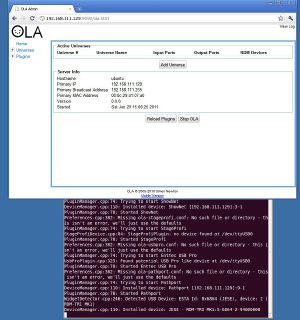
Open up a browser on the Windows PC and type in the IP address, followed by :9090. This will bring up the OLA web console.
